Menu

Show posts

This section allows you to view all posts made by this member. Note that you can only see posts made in areas you currently have access to.

Show posts Menu

Topics - VastOne

#41
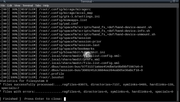
VSIDO FSA updated today for the new 6.0.0-5-amd64 kernel

You can download the vsido_29NOV2022.fsa fsarchive at the VSIDO download site here

There is also a How To on how to effectively use fsarchive to get this installed

There is a current a package list that shows everything that is installed in VSIDO. Please review this file and let me know of anything needed removed or added
#42
VSIDO FSA updated today for the new 6.0.0-4-amd64 kernel

You can download the vsido_12NOV2022.fsa fsarchive at the VSIDO download site here

There is also a How To on how to effectively use fsarchive to get this installed

There is a current a package list that shows everything that is installed in VSIDO. Please review this file and let me know of anything needed removed or added
#43
VSIDO FSA updated today for the new 6.0.0-3-amd64

You can download the vsido_09NOV2022.fsa fsarchive at the VSIDO download site here

There is also a How To on how to effectively use fsarchive to get this installed

There is a current a package list that shows everything that is installed in VSIDO. Please review this file and let me know of anything needed removed or added
#44
VSIDO Discussions / Kernel updates
November 03, 2022, 05:11:48 AM
Hey all

I am seeing something that in all my 15 years in Linux I have not seen and am curious what you all think about it. There have been two updates to the current kernel:

Linux vsido 6.0.0-2-amd64 #1 SMP PREEMPT_DYNAMIC Debian 6.0.6-2 (2022-11-01) x86_64 GNU/Linux

Before the 6.0.6-2 there was a 5.10.1-1 that was from a few days ago. The 'issue' is that unlike kernel updates in the past where you actually got a new kernel and had to reboot to go into it, these are updating the kernel but leaving the 6.0.0-2-amd64 as the only kernel on the system

I know that debian / Linus has been talking about a kernel that could be updated on the fly and that would not need a reboot, and dizzie pointed out that was to known as a special breed kernel. So my question is simple, what do y'all think?
#45
VSIDO FSA updated today for the new 6.0.0-2-amd64

I also made sure that the latest perl packages were safely installed after the latest perl update (jam)

You can download the vsido_05NOV2022.fsa fsarchive at the VSIDO download site here

There is also a How To on how to effectively use fsarchive to get this installed

There is a current a package list that shows everything that is installed in VSIDO. Please review this file and let me know of anything needed removed or added
#46
VSIDO FSA updated today for the new 6.0.0-1-amd64

I also reinstalled GMusicBrowser and Pithos that were not loading correctly and also corrected several menu / launchers

You can download the vsido_18OCT2022.fsa fsarchive at the VSIDO download site here

There is also a How To on how to effectively use fsarchive to get this installed

There is a current a package list that shows everything that is installed in VSIDO. Please review this file and let me know of anything needed removed or added
#47
VSIDO FSA updated today for the new 5.19.0-2 kernel

You can download the vsido_26SEPT2022 fsarchive at the VSIDO download site here

There is also a How To on how to effectively use fsarchive to get this installed

There is a current a package list that shows everything that is installed in VSIDO. Please review this file and let me know of anything needed removed or added
#48
VSIDO FSA updated today for the new 5.19 kernel

You can download the vsido_linux_02SEPT2022 fsarchive at the VSIDO download site here

There is also a How To on how to effectively use fsarchive to get this installed

There is a current a package list that shows everything that is installed in VSIDO. Please review this file and let me know of anything needed removed or added
#49
VSIDO Changes / VSIDO Forum avatars
August 30, 2022, 07:18:49 PM
The database that holds the avatars for this site had some corruption that I have now fixed with a repair

Some of you may have to once again upload your avatar in your profile/forum profile

You can also save an avatar at a site like postimg and use the direct link to the file under the same profile/forum profile

Apologies for the hassles
#50
Here let's discuss what is missing, needed or any issues related to VSIDO fsarchive
#51
VSIDO News & Announcements / VSIDO FSA Updated
August 29, 2022, 03:06:49 AM
I updated the FSA today.. cleaned it up and brought the file size down to a gig. You can download the 28AUG2022 fsarchive at the VSIDO download site here

There is also a How To on how to effectively use fsarchive to get this installed

There is also now a current a package list that shows everything that is installed in VSIDO. Please review this file and let me know of anything needed removed or added
#52
As stated in this announcement VSIDO has a new method for installing. This will be a How To on getting it installed on a system

I will be using SpaceFM and the tools installed in VSIDO and on the last VSIDO Live CD to show how this is done

ADDENDUM : For those die hard hackers who don't use anything but terminal a second method was added for terminal installations that was suggested and tested by PackRat

ADDENDUM 2: A third method has been added a Install to clean partitioned drive with a legacy BIOS system method that was suggested and tested by PackRat

Method 1: Terminal installation:

For those of you who do not use or have spacefm, this is the terminal command to install the fsa version of VSIDO. This should be run from wherever your file is located or supply the path before the actual fsa file. Also make sure you select the correct device/partition you are restoring to. This partition can be blank

sudo fsarchiver -v restfs vsido_23DEC2023.fsa id=0,dest=/dev/sdxx
Once done proceed to Step 7

Method 2: SpaceFM Installation:

1: The first thing needed is a blank partition, it will be created as an ext4 with this process. In SpaceFM right click on that partition and select Root/Restore/From


2:  Select the fsarchive you have downloaded


3:  Accept the default fsarchive options


4:  Enter your root/sudo password


5:  You will have to type in yes and hit enter


6:  You will then see the finished message


You can click on the partition you installed it to and see the new installation


7: Finally you will need to update grub from terminal so that the new install of VSIDO will show in your grub menu

$ sudo update-grub
Method 3 - Install to clean partitioned drive with a legacy BIOS system:

Needed -
1. Live system with fsarchiver included. I used SystemRescue for this exercise. The VSIDO iso should also work.
2. The VSIDO fsarchive file on an accessible drive/partition.

Step 1 - Back up any data on the target drive

Step 2 - Boot the live session and use it to create a target partition for the install. For this install, I deleted all the existing partitions on the drive and created a new partition (sda1) for the install of VSIDO. Also created an additional partition to hold the VSIDO fsarchive file. Partitions were formatted to ext4

Step 3 - Log into an xsession and download the VSIDO fsarchive file. In this example I downloaded the file to one of the partitions I created in Step 2. I assume the fsarchive file could also be restored from an external drive or removable media.

Step 4 - Unpack the fsarchive to the target partition. Use Method 1 or Method 2 depending on tools available.

Before updating grub, the user needs to chroot into the system.

Mount the partition and file systems -

sudo mount /dev/sda1 /mnt

sudo mount --bind /dev /mnt/dev
sudo mount --bind /proc /mnt/proc
sudo mount --bind /sys /mnt/sys

chroot into the system

sudo chroot /mnt
update and reinstall grub

update-grub

sudo grub-install /dev/sda
sudo grub-install --recheck /dev/sda

exit chroot and unmount file systems and partition

# exit chroot
exit

# unmount
sudo umount /mnt/sys &&
sudo umount /mnt/proc &&
sudo umount /mnt/dev &&
sudo umount /mnt

Shutdown the system, remove the thumbdrive, and reboot into a VSIDO system.

Post Installation

These things should be done once you boot and are logged into the new install the first time

8: Create your own user and /home

sudo adduser yourusername
9: Give sudo rights to your new user

sudo usermod -aG sudo yourusername
If you want to setup a different home location, a swap drive or any other location, now is when you should edit your fstab and setup your system how you want it

10: Update grub on your new setup

$ sudo update-grub
10a: Change your timezone, because the timezone is US Central Time (Chicago)  that's because fsarchiver preserves that information, and it's simply restored. You can use this link - Set/Change timezone Debian 10. The Debian Wiki also has the info, but it's in this really, really verbose wiki page

11: Possible UUID issues. If you have or want to have multiple VSIDO installs on the same machine, you may run into an issue with UUID's conflicting. To correct this there is a How To - Correct UUID When Installing to Same Machine. You only need worry about this if you are installing a second VSIDO instance using the fsarchive method.

12: Log out and then log back in to your user name. When you are setup and user that everything is as you want it run this command to delete and purge the vsido user that you originally logged in with

WARNING : ONLY DO THIS AFTER YOU HAVE LOGGED IN WITH YOUR NEW USER

sudo userdel -r vsido

On the same page where you downloaded the fsa file there are VSIDO ISO files that can still be burned to a thumb drive or CD/DVD. That USB would then have everything and every tool needed to boot to a live setting and install if you wanted to do it that way. In part two of this How To I will show how to install on a system that does not have grub using those tools
#53
I have uploaded an fsarchive file to the VSIDO download site here

Using fsarchive this will install a current version of VSIDO with everything functional to any partition you restore it to

It has vsido as the default user with vsido as the pw and vsido is also already a part of sudoers group

Any user could change the name of vsido to their own and but it may be easier to create a new user after install then login with it and give that user sudoer rights and you would have the same

The file size is 1 gig and is up to date with the latest SID and latest SID kernel

I will also continue as in the past to update this every time there is a kernel change

I have also posted a How To on how to effectively use fsarchive to get this installed

Enjoy
#54
I've Got a Life / Heavy Heart
February 13, 2022, 06:02:57 AM
I lost my baby brother last night, he succumbed to Type 2 diabetes that he struggled with all of his 42 years.. He lost both legs to it several years ago but never gave up

Recently he found that his organs were beginning to fail and he as he napped early yesterday evening he passed

Love and hug those you have and hold dear

Terry
#55
If anyone noticed today VSIDO.ORG has been down most of the day.. Turns out that one.com decided it was time to retire php 7.x.. I have no issues with that except they somehow failed to communicate it and it caused me a shitload of issues

In the end I got it fixed through some god#*$&*#$& luck and it appears to be all right again

We shall see
#56
General Support / Kernel 5.14.01 and nVidia woes
September 23, 2021, 07:38:26 PM
This is already a solved issue but I am going to post it for anyone in the future for reference

Also ... It has been a while since I have done a How To or even been around.. I am still alive, still hoping for a different installer for VSIDO but also life happens and I love to golf... Cheers

I got back from a 2 week holiday with 2 of my sons, my daughter and my granddaughters up north to a massive update (obviously) and it included a new kernel jumping me from 5.10 to 5.14

I run nVidia latest drivers and didn't notice anything on the dkms build but honestly I was not really paying close attention... Upon reboot top that driver I was greeted with a failed to load start kernel module error and suspected it was a nVidia issue straight away.. This is how I solved it based on this nugget I found searching for a quick way to fix it

I started that kernel in repair mode which brings you to a spot to enter your root pw
I then used the following commands to start the network

(This was done a day later)

#ip link (it tells you what the card name is, in my case it was enp6s0)
# ip link set enp6s0 up


I then did the following:

# apt-get update
# apt-get dist-upgrade


Right away I noticed that the nVidia drivers had been updated and that a fix was already in place

All I had to do was apply the following to commit the kernel and new packages together

dpkg-reconfigure nvidia-kernel-dkms

I then just typed exit for a reboot (or ctrl alt del)

And booted to 5.140-1 perfectly

For those who live by the POIDH (Picture Or It Didn't Happen) creed

#57
I have a PC that I have not booted into for a long time, at least 2 years

I tried to do a VSIDO install and here is where the weirdness begins .. When using the last/latest VSIDO ISO in live cd it boots fine with the realtek r8169 NIC loading and working fine. As soon as it is installed though I get the following message on boot and no network

no dedicated PHY driver found for PHY ID 0x01001002, maybe realtek.ko needs to be added to initramfs?

I have spent a couple of days trying to figure this out and I am stumped

First this is a Gigabyte GA-MA790X-UD4P motherboard that has the realtek r8169 as the onboard NIC and it has been flashed to its latest rom

After trying to update to newer kernels with no luck I decided to take a FSArchive of a working pc from a while back that has the 4.19 kernel, i installed it and the NIC and everything works fine. Every bit of code has been updated to the latest SID levels except the kernel

I have also installed the latest 5.9.0-5 and it fails but after reading about this all over google I think if I tried the 5.4 kernel it might work

I am now going to post two sets of data.. one of the working 4.19 kernel followed by the 5.9.0-5 that failed.. I am not necessarily looking for a solution like the good people over on Arch did here but I would like to discuss why some kernels appear to work and others seem to have left the r8169 code completely out

First set of data is from the working 4.19 kernel

lspci #

00:00.0 Host bridge: Advanced Micro Devices, Inc. [AMD/ATI] RD780 Host Bridge
00:03.0 PCI bridge: Advanced Micro Devices, Inc. [AMD/ATI] RD790 PCI to PCI bridge (external gfx0 port B)
00:04.0 PCI bridge: Advanced Micro Devices, Inc. [AMD/ATI] RD790 PCI to PCI bridge (PCI express gpp port A)
00:0a.0 PCI bridge: Advanced Micro Devices, Inc. [AMD/ATI] RD790 PCI to PCI bridge (PCI express gpp port F)
00:11.0 SATA controller: Advanced Micro Devices, Inc. [AMD/ATI] SB7x0/SB8x0/SB9x0 SATA Controller [IDE mode]
00:12.0 USB controller: Advanced Micro Devices, Inc. [AMD/ATI] SB7x0/SB8x0/SB9x0 USB OHCI0 Controller
00:12.1 USB controller: Advanced Micro Devices, Inc. [AMD/ATI] SB7x0 USB OHCI1 Controller
00:12.2 USB controller: Advanced Micro Devices, Inc. [AMD/ATI] SB7x0/SB8x0/SB9x0 USB EHCI Controller
00:13.0 USB controller: Advanced Micro Devices, Inc. [AMD/ATI] SB7x0/SB8x0/SB9x0 USB OHCI0 Controller
00:13.1 USB controller: Advanced Micro Devices, Inc. [AMD/ATI] SB7x0 USB OHCI1 Controller
00:13.2 USB controller: Advanced Micro Devices, Inc. [AMD/ATI] SB7x0/SB8x0/SB9x0 USB EHCI Controller
00:14.0 SMBus: Advanced Micro Devices, Inc. [AMD/ATI] SBx00 SMBus Controller (rev 3a)
00:14.1 IDE interface: Advanced Micro Devices, Inc. [AMD/ATI] SB7x0/SB8x0/SB9x0 IDE Controller
00:14.2 Audio device: Advanced Micro Devices, Inc. [AMD/ATI] SBx00 Azalia (Intel HDA)
00:14.3 ISA bridge: Advanced Micro Devices, Inc. [AMD/ATI] SB7x0/SB8x0/SB9x0 LPC host controller
00:14.4 PCI bridge: Advanced Micro Devices, Inc. [AMD/ATI] SBx00 PCI to PCI Bridge
00:14.5 USB controller: Advanced Micro Devices, Inc. [AMD/ATI] SB7x0/SB8x0/SB9x0 USB OHCI2 Controller
00:18.0 Host bridge: Advanced Micro Devices, Inc. [AMD] Family 10h Processor HyperTransport Configuration
00:18.1 Host bridge: Advanced Micro Devices, Inc. [AMD] Family 10h Processor Address Map
00:18.2 Host bridge: Advanced Micr-o Devices, Inc. [AMD] Family 10h Processor DRAM Controller
00:18.3 Host bridge: Advanced Micro Devices, Inc. [AMD] Family 10h Processor Miscellaneous Control
00:18.4 Host bridge: Advanced Micro Devices, Inc. [AMD] Family 10h Processor Link Control
01:00.0 VGA compatible controller: NVIDIA Corporation G96C [GeForce 9500 GT] (rev a1)
02:00.0 SATA controller: JMicron Technology Corp. JMB363 SATA/IDE Controller (rev 02)
02:00.1 IDE interface: JMicron Technology Corp. JMB363 SATA/IDE Controller (rev 02)
03:00.0 Ethernet controller: Realtek Semiconductor Co., Ltd. RTL8111/8168/8411 PCI Express Gigabit Ethernet Controller (rev 03)
04:0e.0 FireWire (IEEE 1394): Texas Instruments TSB43AB23 IEEE-1394a-2000 Controller (PHY/Link)


sudo journalctl -b #

journalctl -b # can be found here

systemctl list-unit-files --state=enabled

UNIT FILE                STATE   VENDOR PRESET
acpid.path               enabled enabled     
acpi-fakekey.service     enabled enabled     
acpi-support.service     enabled enabled     
anacron.service          enabled enabled     
apparmor.service         enabled enabled     
atd.service              enabled enabled     
avahi-daemon.service     enabled enabled     
blk-availability.service enabled enabled     
bluetooth.service        enabled enabled     
console-setup.service    enabled enabled     
cron.service             enabled enabled     
e2scrub_reap.service     enabled enabled     
getty@.service           enabled enabled     
irqbalance.service       enabled enabled     
keyboard-setup.service   enabled enabled     
live-config.service      enabled enabled     
live-tools.service       enabled enabled     
lm-sensors.service       enabled enabled     
lvm2-monitor.service     enabled enabled     
minidlna.service         enabled enabled     
minissdpd.service        enabled enabled     
networking.service       enabled enabled     
ntp.service              enabled enabled     
quota.service            enabled enabled     
quotarpc.service         enabled enabled     
rsync.service            enabled enabled     
rsyslog.service          enabled enabled     
rtkit-daemon.service     enabled enabled     
ssh.service              enabled enabled     
systemd-pstore.service   enabled enabled     
udisks2.service          enabled enabled     
vsftpd.service           enabled enabled     
wpa_supplicant.service   enabled enabled     
acpi-fakekey.socket      enabled enabled     
acpid.socket             enabled enabled     
avahi-daemon.socket      enabled enabled     
dm-event.socket          enabled enabled     
lvm2-lvmpolld.socket     enabled enabled     
uuidd.socket             enabled enabled     
remote-fs.target         enabled enabled     
anacron.timer            enabled enabled     
apt-daily-upgrade.timer  enabled enabled     
apt-daily.timer          enabled enabled     
e2scrub_all.timer        enabled enabled     
exim4-base.timer         enabled enabled     
logrotate.timer          enabled enabled     
man-db.timer             enabled enabled     
mlocate.timer            enabled enabled


vastone@vsido:~$ lsmod |grep r81
r8169                  90112  0
libphy                 77824  3 r8169,realtek


vastone@vsido:~$ lsmod |grep real
snd_hda_codec_realtek   118784  1
snd_hda_codec_generic    86016  1 snd_hda_codec_realtek
snd_hda_codec         151552  3 snd_hda_codec_generic,snd_hda_intel,snd_hda_codec_realtek
snd_hda_core           94208  4 snd_hda_codec_generic,snd_hda_intel,snd_hda_codec,snd_hda_codec_realtek
snd                    94208  15 snd_hda_codec_generic,snd_seq,snd_seq_device,snd_hwdep,snd_hda_intel,snd_hda_codec,snd_hda_codec_realtek,snd_timer,snd_pcm
realtek                20480  0
libphy                 77824  3 r8169,realtek

vastone@vsido:~$ sudo dmesg |grep -i r8169
[    2.297190] libphy: r8169: probed
[    2.297341] r8169 0000:03:00.0 eth0: RTL8168d/8111d, 00:24:1d:1d:6c:b4, XID 281000c0, IRQ 24
[    2.297342] r8169 0000:03:00.0 eth0: jumbo features [frames: 9200 bytes, tx checksumming: ko]
[   14.943452] r8169 0000:03:00.0: firmware: direct-loading firmware rtl_nic/rtl8168d-1.fw
[   14.944117] Generic PHY r8169-300:00: attached PHY driver [Generic PHY] (mii_bus:phy_addr=r8169-300:00, irq=IGNORE)
[   16.715243] r8169 0000:03:00.0 eth0: Link is Up - 10Mbps/Full - flow control rx/t


This is now data fom the non working 5.9.0-5 kernel

vastone@vsido:~$ lspci #

00:00.0 Host bridge: Advanced Micro Devices, Inc. [AMD/ATI] RD780 Host Bridge
00:03.0 PCI bridge: Advanced Micro Devices, Inc. [AMD/ATI] RD790 PCI to PCI bridge (external gfx0 port B)
00:04.0 PCI bridge: Advanced Micro Devices, Inc. [AMD/ATI] RD790 PCI to PCI bridge (PCI express gpp port A)
00:0a.0 PCI bridge: Advanced Micro Devices, Inc. [AMD/ATI] RD790 PCI to PCI bridge (PCI express gpp port F)
00:11.0 SATA controller: Advanced Micro Devices, Inc. [AMD/ATI] SB7x0/SB8x0/SB9x0 SATA Controller [IDE mode]
00:12.0 USB controller: Advanced Micro Devices, Inc. [AMD/ATI] SB7x0/SB8x0/SB9x0 USB OHCI0 Controller
00:12.1 USB controller: Advanced Micro Devices, Inc. [AMD/ATI] SB7x0 USB OHCI1 Controller
00:12.2 USB controller: Advanced Micro Devices, Inc. [AMD/ATI] SB7x0/SB8x0/SB9x0 USB EHCI Controller
00:13.0 USB controller: Advanced Micro Devices, Inc. [AMD/ATI] SB7x0/SB8x0/SB9x0 USB OHCI0 Controller
00:13.1 USB controller: Advanced Micro Devices, Inc. [AMD/ATI] SB7x0 USB OHCI1 Controller
00:13.2 USB controller: Advanced Micro Devices, Inc. [AMD/ATI] SB7x0/SB8x0/SB9x0 USB EHCI Controller
00:14.0 SMBus: Advanced Micro Devices, Inc. [AMD/ATI] SBx00 SMBus Controller (rev 3a)
00:14.1 IDE interface: Advanced Micro Devices, Inc. [AMD/ATI] SB7x0/SB8x0/SB9x0 IDE Controller
00:14.2 Audio device: Advanced Micro Devices, Inc. [AMD/ATI] SBx00 Azalia (Intel HDA)
00:14.3 ISA bridge: Advanced Micro Devices, Inc. [AMD/ATI] SB7x0/SB8x0/SB9x0 LPC host controller
00:14.4 PCI bridge: Advanced Micro Devices, Inc. [AMD/ATI] SBx00 PCI to PCI Bridge
00:14.5 USB controller: Advanced Micro Devices, Inc. [AMD/ATI] SB7x0/SB8x0/SB9x0 USB OHCI2 Controller
00:18.0 Host bridge: Advanced Micro Devices, Inc. [AMD] Family 10h Processor HyperTransport Configuration
00:18.1 Host bridge: Advanced Micro Devices, Inc. [AMD] Family 10h Processor Address Map
00:18.2 Host bridge: Advanced Micro Devices, Inc. [AMD] Family 10h Processor DRAM Controller
00:18.3 Host bridge: Advanced Micro Devices, Inc. [AMD] Family 10h Processor Miscellaneous Control
00:18.4 Host bridge: Advanced Micro Devices, Inc. [AMD] Family 10h Processor Link Control
01:00.0 VGA compatible controller: NVIDIA Corporation G96C [GeForce 9500 GT] (rev a1)
02:00.0 SATA controller: JMicron Technology Corp. JMB363 SATA/IDE Controller (rev 02)
02:00.1 IDE interface: JMicron Technology Corp. JMB363 SATA/IDE Controller (rev 02)
03:00.0 Ethernet controller: Realtek Semiconductor Co., Ltd. RTL8111/8168/8411 PCI Express Gigabit Ethernet Controller (rev 03)
04:0e.0 FireWire (IEEE 1394): Texas Instruments TSB43AB23 IEEE-1394a-2000 Controller (PHY/Link)


vastone@vsido:~$ systemctl list-unit-files --state=enabled

UNIT FILE                STATE   VENDOR PRESET
acpid.path               enabled enabled     
acpi-fakekey.service     enabled enabled     
acpi-support.service     enabled enabled     
anacron.service          enabled enabled     
apparmor.service         enabled enabled     
atd.service              enabled enabled     
avahi-daemon.service     enabled enabled     
blk-availability.service enabled enabled     
bluetooth.service        enabled enabled     
console-setup.service    enabled enabled     
cron.service             enabled enabled     
e2scrub_reap.service     enabled enabled     
getty@.service           enabled enabled     
irqbalance.service       enabled enabled     
keyboard-setup.service   enabled enabled     
live-config.service      enabled enabled     
live-tools.service       enabled enabled     
lm-sensors.service       enabled enabled     
lvm2-monitor.service     enabled enabled     
minidlna.service         enabled enabled     
minissdpd.service        enabled enabled     
networking.service       enabled enabled     
ntp.service              enabled enabled     
quota.service            enabled enabled     
quotarpc.service         enabled enabled     
rsync.service            enabled enabled     
rsyslog.service          enabled enabled     
rtkit-daemon.service     enabled enabled     
ssh.service              enabled enabled     
systemd-pstore.service   enabled enabled     
udisks2.service          enabled enabled     
vsftpd.service           enabled enabled     
wpa_supplicant.service   enabled enabled     
acpi-fakekey.socket      enabled enabled     
acpid.socket             enabled enabled     
avahi-daemon.socket      enabled enabled     
dm-event.socket          enabled enabled     
lvm2-lvmpolld.socket     enabled enabled     
uuidd.socket             enabled enabled     
remote-fs.target         enabled enabled     
anacron.timer            enabled enabled     
apt-daily-upgrade.timer  enabled enabled     
apt-daily.timer          enabled enabled     
e2scrub_all.timer        enabled enabled     
exim4-base.timer         enabled enabled     
logrotate.timer          enabled enabled     
man-db.timer             enabled enabled     
mlocate.timer            enabled enabled     

48 unit files listed.


vastone@vsido:~$ sudo journalctl -b #


take a look at this code here journalctl -b #


vastone@vsido:~$ lsmod |grep r81


r8169                  98304  0
mdio_devres            16384  1 r8169
libphy                151552  3 r8169,mdio_devres,realtek

vastone@vsido:~$ lsmod |grep real
snd_hda_codec_realtek   143360  1
snd_hda_codec_generic    98304  1 snd_hda_codec_realtek
snd_hda_codec         163840  3 snd_hda_codec_generic,snd_hda_intel,snd_hda_codec_realtek
snd_hda_core          106496  4 snd_hda_codec_generic,snd_hda_intel,snd_hda_codec,snd_hda_codec_realtek
snd                   110592  15 snd_hda_codec_generic,snd_seq,snd_seq_device,snd_hwdep,snd_hda_intel,snd_hda_codec,snd_hda_codec_realtek,snd_timer,snd_pcm
realtek                24576  0
libphy                151552  3 r8169,mdio_devres,realtek

vastone@vsido:~$ sudo dmesg |grep -i r8169
[    1.629639] r8169 0000:03:00.0: can't disable ASPM; OS doesn't have ASPM control
[    1.650048] libphy: r8169: probed
[    1.650051] r8169 0000:03:00.0: no dedicated PHY driver found for PHY ID 0x01001002, maybe realtek.ko needs to be added to initramfs?
[    1.665669] r8169: probe of 0000:03:00.0 failed with error -49
#58
VSIDO News & Announcements / The end of the VSIDO era
November 23, 2020, 09:17:06 PM
I want to thank you all who stuck with this project for as long as you have..

By the end of day tomorrow, I anticipate this site will no longer exist as I have simply ran out of funds to even afford to pay a 70 dollar annual fee

I may try to run the site from my home with DDS .. not sure yet, but since there is so little traffic I am not sure anyone would notice

I do have it all backed up, the sad part is that it has always been a resource for solutions and honestly that is all I ever wanted

Cheers to you all .. I can always be reached at vastone at the gmail com
#59

  • Updated VSIDO to latest Debian SID kernel – 4.19.0-5-amd64 #1 SMP Debian 4.19.37-1 (2019-05-05)
  • Updated all applications to the latest SID levels

All changes can be seen and discussed in the VSIDO Change sub forum

All files and torrents can be downloaded from the VSIDO Download page

________________________________


The x64 is installing flawlessly (though still a delay during the bootloader installation)
The x64_uEFI installer is not seeing the /lib/live/mount/medium/live/filesystem.squashfs
even though it is clearly there
#60
Hardware Help & Support / ceni changes
March 28, 2019, 03:07:33 AM
ceni is in Debian repos and when ported there the name was changed to Ceni which caused headaches... 

For those who want it here is  fix for Ceni / ceni so that you won't have to change any menus... Run the following to create a ceni symlink

sudo ln -s /usr/sbin/Ceni /usr/local/bin/ceni

Keep in mind you must know roots PW in order to run ceni.. In VSIDO default you must change the root PW to know it by running:

sudo passwd root