Menu

Show posts

This section allows you to view all posts made by this member. Note that you can only see posts made in areas you currently have access to.

Show posts Menu

Topics - falldown

#1
General Support / Interesting bit of info..
April 25, 2013, 03:31:29 PM
Perhaps I am just behind the curve here,
But did you know that...
Aptitude will automatically remove any unneeded packages the next time you run it but apt-get and synaptic do not.
Aptitude does 'autoremove' automatically.   ...?

I did not know that apt-get and aptitude functioned differently.  :)
#2
Artwork & Screenshots / February 2013 Screenshots
February 01, 2013, 03:33:04 PM
##Post your February Scrots Here##


I will get the ball rolling..  ;D
#3
General Support / SID package warning..
January 31, 2013, 07:32:06 PM
Well out of embarrassment I posted here..
I just did a
sudo apt-get dist-upgrade
Everything went fine except for a ??"libpango"?? package.
It ask me if I wanted to keep installed package or maintainers package.
Not knowing what to do I did maintainers package.

after reboot.. x will not start.
I drop into tty and
sudo startx
I get
/ect/x11/xini/xserver: 3: exec: /user/bin/x: not found
xiniti: unable to connect to xserver: connection refused


So how do I find what I installed and how to fix it?
#4
General Support / LightDM
January 31, 2013, 04:15:59 PM
I wanted to post this here in our section so that we could all try to solve this.

I have installed VSIDO several times (old and new images) and I get the same rainbow screen at login..

similar to this.

Now this goes away after I install my nvidia drivers (separate machines)
I searched the web for answers but have found nothing to resolve this.

What I am concerned about is that others might be getting the same result as I am.
In my opinion this is a HUGE turnoff when booting a new distro for the first time..
not to mention that some people are more comfortable with using the default graphics driver.

By no means am I saying anything negative about VSIDO or the amazing work you are doing VastOne.
I am using VSIDO as my main desktop.
#5
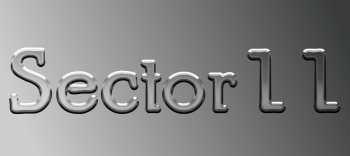
Artwork & Screenshots / Glass Font How to with Gimp
January 22, 2013, 08:44:09 PM
**This is my first Tutorial so if I make a mistake Please be kind and ask questions**
**This is just a tutorial and the settings that I am using to make this specific image**
My process can be used for not only fonts, but any shape or outline.

The settings can be changed for your specific needs.. so experiment!!

Step1
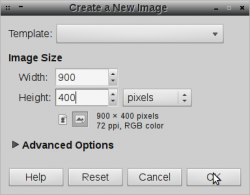
First off you need to open Gimp and Create New using these settings..

Keep this layer named background and fill it with black.

Step 2
Now we need to select our Text tool.. selecting the font I provided above and use the setting here
Make sure to apply the 5.0 gap and beside Justify: select centered.. and be sure that white is selected as well

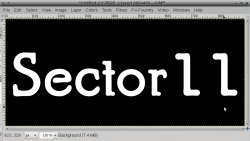
**For this Tut I decided to use a Member of the community that I think we all respect and Value**

In your text box type your chosen name, word or phrase.. once finished with your text center it by using
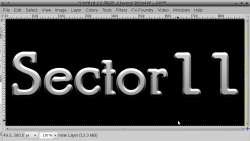
your Alignment Tool and merge this layer down to the black background. Should look similar to mine This will be our Bump Map.
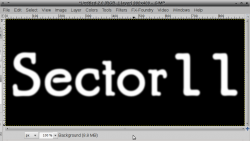
For the Final part of step 2 we will go to Filters/Blur/Gaussian Blur and do 7 for both settings.
Should have a slight blur to your Bump Map now.


Step 3
Now select your Fuzzy Select Tool (or magic wand) and we need to select our text by clicking the black area outside and the inside black areas of our Bump Map layer.
With the selection still active create a new transparent layer.
Now select our Blend Tool and change our foreground and background colors to these.

Foreground color "cecece"
Background color "9e9e9e"
With our outline selection still active go to Select/invert click to invert our selection.
Now on the newly created layer take the Blend tool and start at the top of the selection and go straight down to the bottom of the selection as shown
Go to Select/none and click it to remove the outline selection.

Step 4
Now lets use our Bump Map.
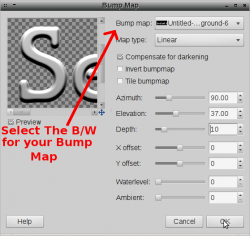
Still on our new layer with the Gradient gray text go to Filters/Map/Bump Map and select it.
Use these settings for the Bump Map filter 
Make sure to select your original Black and White layer for the top option
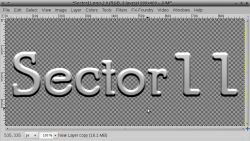
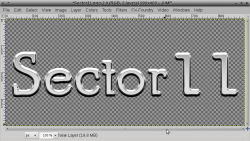
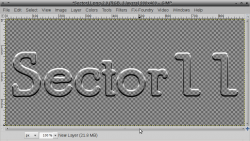
Click ok and your gray text should look like this.

With some nice depth added to our text.
Lets turn off the visability our Original B/W Background layer by clicking the eye out to the side of the layer.. because we are done with it..

Step 5
This step is one of the coolest in my opinion. You get to see some of the power that Gimp has!!
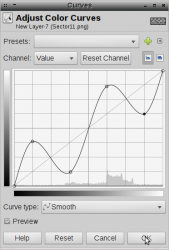
Go to Color/Curves and select it.. In the Curves setting window move the slider into an S pattern as I have Click ok and now it should look like this

Now you have a really cool looking Chrome effect text and could actually stop here, but we will go a bit further :D

The dimensions of your project will determine what settings you use for the next 2 steps
**smaller font = lower settings / larger font = higher settings**


Step 6
Now lets duplicate our chrome text layer and turn off the visibility of the copy as we will work with it later.
Go to Layer/Transparency/Alpha to Selection which will select our text.. Now go to Select/Shrink and use 5 for the selection.
Now go to Select/Feather and use 5,000 and click ok. Finally go to Edit/Clear and click.. then Select/none.. Now This Text layer should look like this

Step 7
Now for the inside of our text.
Now select the copy from step 6.
Go to Layer/Transparency/Alpha to Selection and then Select/Shrink and do a selection of 7 this time around.
Now we need to Select/Invert then Select/Feather and chose 7,000 for this one.
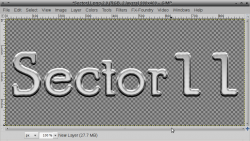
Edit/Clear and Select/none.. now you should have this
Now lets Merge the 2 layers together and you should have this..

Step 8
This is our Final step..
This is how we get our "transparent" Glass effect.
Go to Layer/Transparency/Color to Alpha.
Lets select a gray that is the middle of the gradient that we used earlier so we will select "d4d4d4" and click ok.
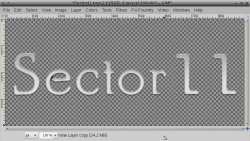
Low and Behold!! We now have a very cool Glass looking text!!


Have fun with this and experiment!! You can use different colors for the Gradient.. just try different settings. :D

Sector11 I hope you don't mind that I used you in this Tutorial :D

**Like I said earlier this is my first time trying to explain my techniques in Gimp so I am sorry if I left something out or if I didn't explain something well enough**

EXPERIMENT WITH DIFFERENT LAYER TYPEs
#6
Artwork & Screenshots / Community custom wallpapers..
January 15, 2013, 04:55:08 PM
A place for us to share our Wallpapers.
##IF MODIFYING SOMEONE ELSE'S WALL PLEASE GIVE CREDIT TO ORIGINAL ARTIST##

Please use thumbnails to display your work.
#7
Introductions / Hola
January 14, 2013, 11:44:48 PM
Hello all fellow VSIDO-ens..

I am Chris, but you may all call me falldown 
Longtime linux user.. (well if 4 or so years is concidered longtime).

My passion started with LM and then Ubuntu.. Got my hands dirty with Gentoo and Arch. (Never joined the forums)
Stumbled across CrunchBang and joined it for the community. Met some Great people there.
And then VastOne turned me on to debian netinstal which I built and have been using and tweaking for about a year now.

During that year I watched VSIDO grow.. Reading VastOne's How-tos and keeping an eye on his Screenshots.
Well it is here.. and I truly enjoy using it and being a part of this fine group of GENTS.

Ok that is enough about me.